
LTL Blog
Lineman's Testing Laboratories of Canada
Ensuring Electrical Sa...
Ensuring the Integrity...
Tips for safety when w...
7 Benefits to Using Gr...
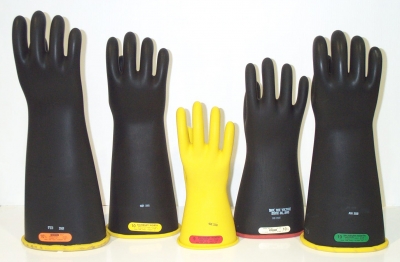
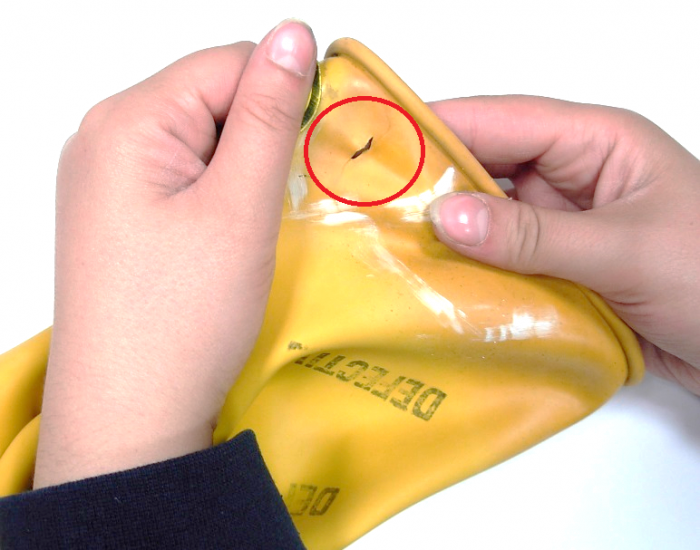
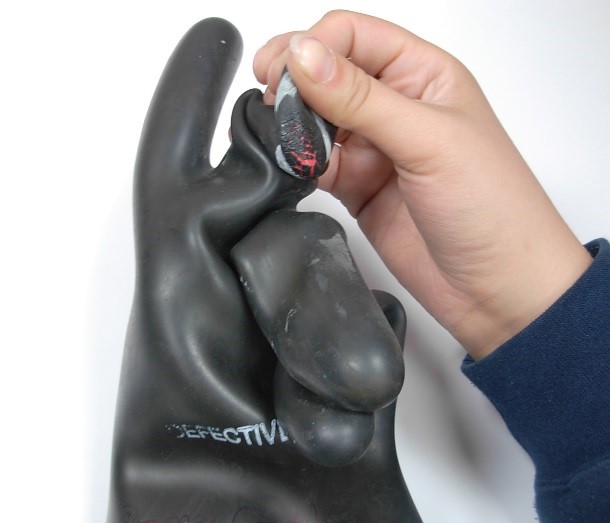
Did you know that when there is damage to your electrical rubber gloves, the integrity of your gloves are compromised? This means that they are no longer safe to wear.
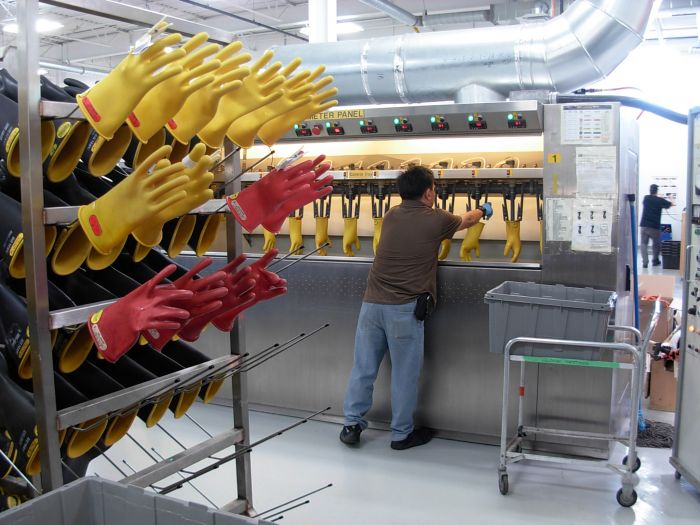
As Canada’s largest supplier of insulating rubber gloves and PPE, one question we are frequently asked is about the proper storage and care of rubber gloves. That’s why we’ve created these four simple steps to help you prolong the life of your gloves and keep you safe when using them:
Step 1) Wash your gloves with a mild soap and rinse thoroughly with water. Only use soapy water or denatured alcohol to clean the label area. Then air dry the gloves.
Step 2) Visually inspect your gloves inside and out for damage before and after each use. Check for cracks, tears, stretches and holes.
Step 3) When not in use, store the insulating rubber gloves in a bag specifically designed for electrical gloves.
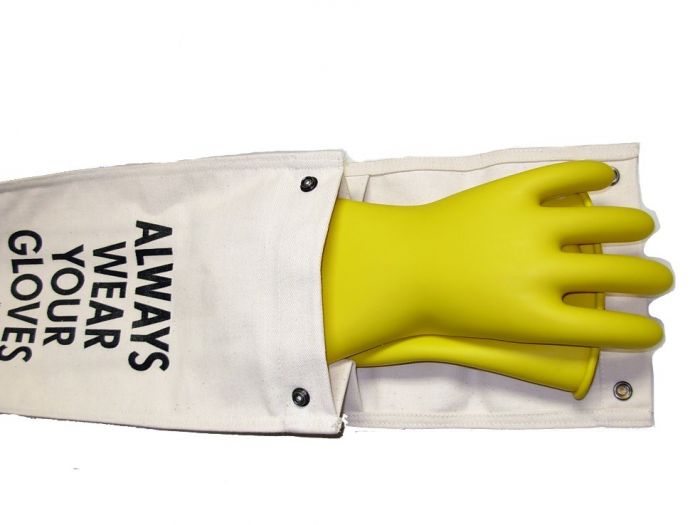
Store the bag in a cool, dark and dry place away from any sharp or heavy objects that could potentially damage the gloves. Ensure the area is free from ozone, chemicals, oils, solvents, damaging vapors/fumes and away from possible electrical discharge and sunlight. These materials can damage the gloves.
Rubber gloves should be placed in the bag in their natural shape and stacked on top of each other. Rubber gloves shouldn’t be stored folded, creased, inside out or in any manner that will cause stretching or major compression.
Step 4) Send your electrical insulated gloves to our NAIL-Accredited testing lab every 90 days (per IHSA) or as recommended by your local legislation.
Our product specialists offer assistance in selecting the appropriate PPE for your specific application. As a quick resource, you can refer to the ASTM Chart to help identify the proper electrical glove class required for your application.
Call or e-mail us for more information or to sign up for our automatic glove replacement program; which ensures timely turnaround when replacing failed gloves during recertification.
Want more? Check out our 12-step glove testing process!
Following these simple steps will help to ensure your gloves are doing their job so you can do yours, safely.
Your comment will go through an approval process and may not be visible to the public right away.
